

photography
Guía de fotografía en Islandia
Fotografía cascadas, glaciares, costas negras, auroras y sol de medianoche con consejos de lugares, cámara, equipo y seguridad.
Actualizado
Por qué Islandia es ideal para la fotografía
Islandia recompensa a quienes planifican según luz, tiempo y duración, no solo coleccionan miradores. Cascadas, glaciares, playas negras y montañas se encuentran relativamente cerca, mientras su latitud cambia drásticamente la luz entre estaciones.
Conviene ir sin prisas. Las nubes se abren, la dirección del rocío cambia, los icebergs giran y las mareas reorganizan la costa. Las imágenes más fuertes suelen surgir de adaptarse en lugar de obligar al paisaje a encajar en una lista.
Esta guía utiliza los lugares de GoIceTravel y añade consejos sobre horarios, luz, objetivos, seguridad y tiempo necesario en cada parada.
Best Photography Locations in Iceland
These are strong starting points for a first photography trip because they cover several very different Icelandic subjects: glaciers, waterfalls, coast, mountains and Highlands landscapes.

Jökulsárlón Glacier Lagoon
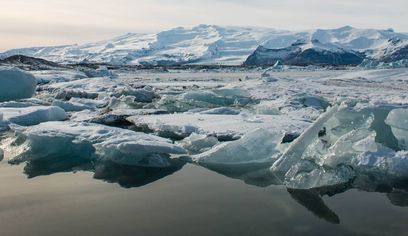
A constantly changing glacier-lagoon scene where ice shape, colour, reflections and weather create new compositions every few minutes.
Use both wide and telephoto focal lengths. Wide lenses establish the lagoon and mountains; a telephoto isolates ice shapes, seals and compressed layers of floating ice.

Breiðamerkursandur/Diamond Beach
Black volcanic sand and pieces of glacial ice create strong contrast, but the scene changes continuously with tide and surf.
Watch several wave cycles before setting up. Use a shutter speed that preserves some texture in the surf and never turn your back on the ocean.

Seljalandsfoss
A classic South Coast waterfall with unusually varied angles, including the walk-behind route when it is safely open.
Carry several lens cloths. Spray is constant near and behind the falls. Experiment with both faster shutter speeds for texture and slower exposures for smooth water.

Skógafoss
A powerful, clean waterfall composition that works in almost any weather and often produces rainbows when sunlight reaches the mist.
Try a longer focal length from farther back to control spray, then move closer for scale. A person near the base can emphasize the waterfall’s size.

Dyrhólaey
Elevated coastal viewpoints, sea stacks, black beaches and seasonal birdlife make Dyrhólaey one of the strongest broad-landscape stops on the South Coast.
A telephoto is useful for compressed coastline views and wildlife, while a standard zoom handles the cliffs and sweeping beaches.

Vestrahorn Mountain & Stokksnes
Vestrahorn’s sharp mountain profile works with black dunes, wet sand, grasses and shallow reflections, giving photographers many foreground choices.
Do not lock onto the famous reflection composition. Walk the area and look for dune patterns, grasses and compressed details when the reflection pools are weak.

Kirkjufell
One of Iceland’s most recognisable mountain subjects, with multiple compositions around Grundarfjörður and nearby Kirkjufellsfoss.
Move beyond the standard tripod holes. A mid-range or telephoto lens can produce cleaner mountain studies and reduce visual clutter.

Landmannalaugar
Rhyolite mountains, dark lava and sweeping hiking viewpoints make Landmannalaugar one of Iceland’s most colourful landscape-photography areas.
Use foreground ridges and trails to create depth. A longer lens is excellent for isolating coloured mountain layers from elevated viewpoints.
Fotografía en la Costa Sur
La Costa Sur combina numerosos motivos con distancias moderadas. Seljalandsfoss y Skógafoss permiten composiciones de cascadas distintas; Dyrhólaey ofrece acantilados, playas negras y líneas costeras. Evita correr entre demasiados puntos.
En cascadas la dirección del viento es clave porque el rocío cubre la lente. Lleva un paño a mano. En la costa, antepone la seguridad a la foto; no coloques el trípode donde una ola inesperada pueda bloquearte.
Sureste: hielo y montañas
Jökulsárlón y Diamond Beach merecen más que una parada rápida. Los icebergs se mueven y giran, y las olas redistribuyen el hielo en la playa. Mantente lejos del fuerte oleaje.
Vestrahorn ofrece montañas afiladas, dunas negras, reflejos y hierbas. Experimenta con el primer plano; si falta el reflejo famoso, busca una composición diferente.
Oeste de Islandia y Snæfellsnes
Kirkjufell se fotografía tanto que resulta difícil evitar repetir imágenes conocidas. Muévete entre miradores permitidos, cambia focal y busca relaciones entre montaña, agua y tiempo. El teleobjetivo permite composiciones más sencillas.
Fotografiar las Tierras Altas
Landmannalaugar destaca por sus montañas multicolores, pero llegar requiere planificar carreteras estacionales, estado actual y vehículo adecuado. Nunca supongas que el acceso de otro verano sigue vigente.
Al caminar, ganar altura ayuda a simplificar el paisaje. Un zoom estándar o teleobjetivo corto puede aislar crestas, nieve y lava mejor que un ultra gran angular.
Fotografía de auroras boreales
Prueba una apertura grande, ISO 1600–3200 y velocidades de 2 a 15 segundos según la intensidad y movimiento. Las auroras fuertes y rápidas suelen conservar mejor su estructura con exposiciones cortas.
Enfoca manualmente a una luz lejana o estrella y verifica ampliando. Incluye un primer plano reconocible: un paisaje con un poco de ruido puede comunicar mucho más que un cielo verde sin contexto.
Ajustes iniciales para auroras
Empieza en torno a f/1.8–f/2.8, ISO 1600–3200 y 4–8 segundos. Ajusta según la intensidad y velocidad de la aurora; cuanto más rápida, más corta la exposición.
Sol de medianoche y hora dorada
En verano el amanecer y atardecer cambian de significado. La luz baja y cálida puede durar horas y las mejores fotos aparecer tarde cuando se han marchado muchos visitantes. Piensa en toda la tarde-noche como una ventana cambiante.
Cómo fotografiar cascadas
No hay una velocidad de obturación única. Las exposiciones largas suavizan el agua y las cortas conservan energía. Prueba varias velocidades. El polarizador reduce reflejos y un filtro ND permite exposiciones largas con mucha luz.
El rocío es el enemigo práctico. Compón, limpia la lente justo antes del disparo y toma varias fotos. La ropa impermeable protege al fotógrafo igual que el sellado de la cámara.
Equipo y ajustes de cámara
Un gran angular va bien para auroras, cascadas y paisajes, pero el zoom normal sirve para la mayoría del viaje y el teleobjetivo es importante para fauna, detalles del hielo y montañas. Un trípode firme ayuda en auroras y exposiciones largas.
Lleva baterías de repuesto, paños de microfibra, funda contra lluvia, parasol y almacenamiento para RAW. Permite que el equipo frío se caliente gradualmente al entrar en interiores para reducir condensación.
Ninguna foto merece correr riesgos
Respeta barreras, cierres y senderos. Aléjate de playas con olas inesperadas, evita hielo inestable y nunca accedas a cascadas o pistas cerradas solo porque otro fotógrafo lo hizo.
Photography Locations from the GoIceTravel Database


3-Day South Coast Photography Itinerary
3 daysA concentrated route for photographers who want strong variety without trying to cover the entire country.
Seljalandsfoss
Work the front view first, then the walk-behind route only if it is open and safe.
SeljalandsfossJökulsárlón Glacier Lagoon
Stay long enough for the ice and weather to change.
Jökulsárlón Glacier LagoonDiamond Beach
Observe wave behaviour before choosing a safe tripod position.
Breiðamerkursandur/Diamond BeachVestrahorn Mountain & Stokksnes
Explore multiple foregrounds instead of depending on a reflection.
Vestrahorn Mountain & StokksnesPhotography Tours in Iceland
A guided photography tour can be useful when you want local help with conditions, access, timing and composition.
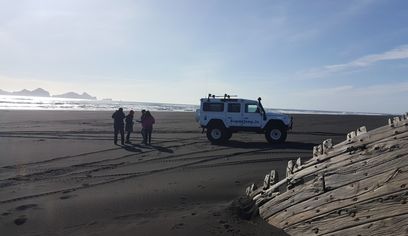 8 hours
DT 322 Private Superjeep South Coast & Eyjafjallajökull Volcano Sights
Superjeep
Desde
264,500 ISK
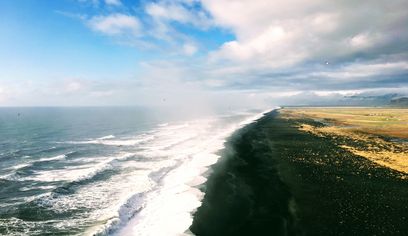 10 hours
Private South Coast tour
EastWest
Desde
220,000 ISK
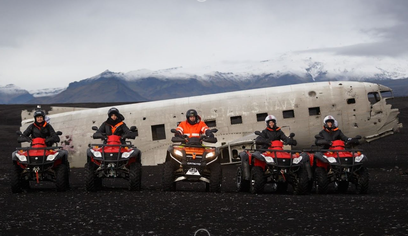 10 hours 30 minutes
South Coast & Plane Wreck Black Beach ATV Adventure
Reykjavik Excursions by Icelandia
Desde
47,499 ISK
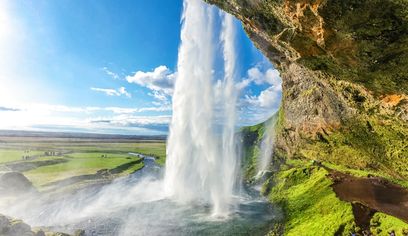 11 hours
Private Premium South Coast Small Group Tour
Iceland Horizon - Saga Travel - GeoIceland
Desde
299,900 ISK
 13 hours
South Coast & Sky Lagoon Saman Pass Tour
BusTravel Iceland
Desde
31,790 ISK
 14 hours
Private South Coast and Glacier Lagoon Day Tour
David The Guide
Desde
279,900 ISK
Build Your Photography Route
Use the GoIceTravel trip planner to combine photography locations with realistic driving days and overnight stops.
Open Trip Planner


